CLOSE
CLOSE
Search
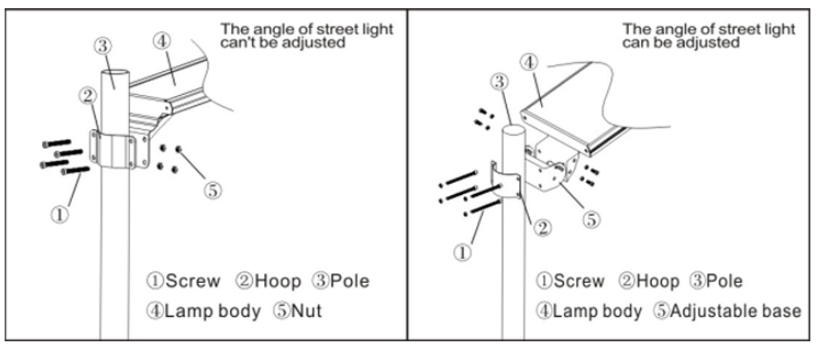
Anchor Installation
1)Tighten the light body of solar lights products and anchor, to hold the pole hardly and then tighten the screw (Picture as below)

2) Finished installation of integrated solar street light (Picture as below)
(Remark: The adjustable street light 15 watt with a solar power lighting system needs to be installed with an adjustable base and an anchor to hold the pole hardly, and then the angle of the light body and adjustable base can be fixed by screws.)
Installation with nail light on the wall
After hole punch on the wall, make sure the base match the hole and then tighten the screw (Picture as below)
Vertical Type Sleeve Installation
First, screw the base onto the lamp body. Then, turn the lamp body and the solar panel up, the base down, set into the lamp pole. Tighten the screws. (Picture as below)
Horizontal Type Sleeve Installation
First, screw the base onto the body of solar lamp products. Then, turn the lamp body and the solar panel up, the base down, set into the lamp pole. Tighten the screws. (Picture as below)
Multi-function base Horizontal Installation
First, screw the base onto the lamp body. Then, turn the lamp body and the solar panel up, the base down, set into the lamp pole. Tighten the screws. (Picture as below)
Multi-function base vertical installation
First, screw the base onto the lamp body. Then, turn the lamp body and the solar panel up, the base down, set into the lamp pole. Tighten the screws. (Picture as below)
Multi-function base solar panel angle adjustment method
First, loosen the middle connecting screw of the base, then adjust the solar panel to the required angle, and tighten the screw.